Automating PyInstaller Builds and Code Signing with PowerShell
When developing desktop software in Python, creating a Windows release often involves a few repetitive steps:
- Running PyInstaller to build an .exe file
- Code-signing the executable (so it doesn’t trigger SmartScreen with "unknown publisher" warnings)
- Cleaning up build folders
To make this process faster and less error-prone, I wrote a small PowerShell script that automates exactly these steps: build, signing, cleanup.
I’ve been using it across my Windows-based Python projects, and it’s been a quiet but reliable productivity boost.
The Script
Here is the script, detailed explanation below.
# ****************************************** #
#    build and sign python app on Windows    #
# ****************************************** #
# Author:    Johannes Kinzig                 #
# Web:       https://johanneskinzig.com      #
# ****************************************** #
# Requires:                                  #
#     Visual Studio 2022 Developer Shell     #
# ****************************************** #

# --> define python main source file and application build name
$app_python_main_source_name = "MyPythonAppMainFile"
$app_exec_name = "MyAppProductName"
$path_to_pfx_keypair = "..\relative\path\to\my-codesign-certificate.pfx"

# --> define complete source file name
$app_python_main_source_filename = $app_python_main_source_name + ".py"
$app_exec_filename = $app_exec_name + ".exe"

# --> building executable using pyinstaller
$task_msg = "Building debug executable for " + $app_exec_filename + " - using PyInstaller"
Write-Output $task_msg

# --> activate virtualenv
..\relative\path\to\PythonVenvs\virtualenv_py3_12_0\Scripts\activate.ps1
# --> enter main application directory (main project folder)
# --> and start building the application using pyinstaller
cd ..
# --> clean all previously generated files (by python and pyinstaller), including previously generated executables
.\clean_all.ps1
pyinstaller --onefile --windowed --hidden-import=pkg_resources.py2_warn --hidden-import=plyer.platforms.win.notification --icon=./ui_media/ico_app.ico --name $app_exec_name $app_python_main_source_filename

cd .\dist

# --> start codesigning process
Write-Output "Signing..."
# --> start developer powershell for this - requires Visual Studio 2022
& 'C:\Program Files\Microsoft Visual Studio\2022\Community\Common7\Tools\Launch-VsDevShell.ps1' -SkipAutomaticLocation

# --> ask for password for codesigning keypair
$secure_paswd = Read-Host "Enter password for code-signing certificate" -AsSecureString
$plaintext_paswd =[Runtime.InteropServices.Marshal]::PtrToStringAuto([Runtime.InteropServices.Marshal]::SecureStringToBSTR($secure_paswd))
# --> sign previously created executable
signtool sign /f $path_to_pfx_keypair /fd certHash /t http://timestamp.digicert.com /p $plaintext_paswd /v $app_exec_filename
# --> verify
signtool verify /pa /v $app_exec_filename
Write-Output "Done with building and signing! Success!"
cd ..\build2app
pause
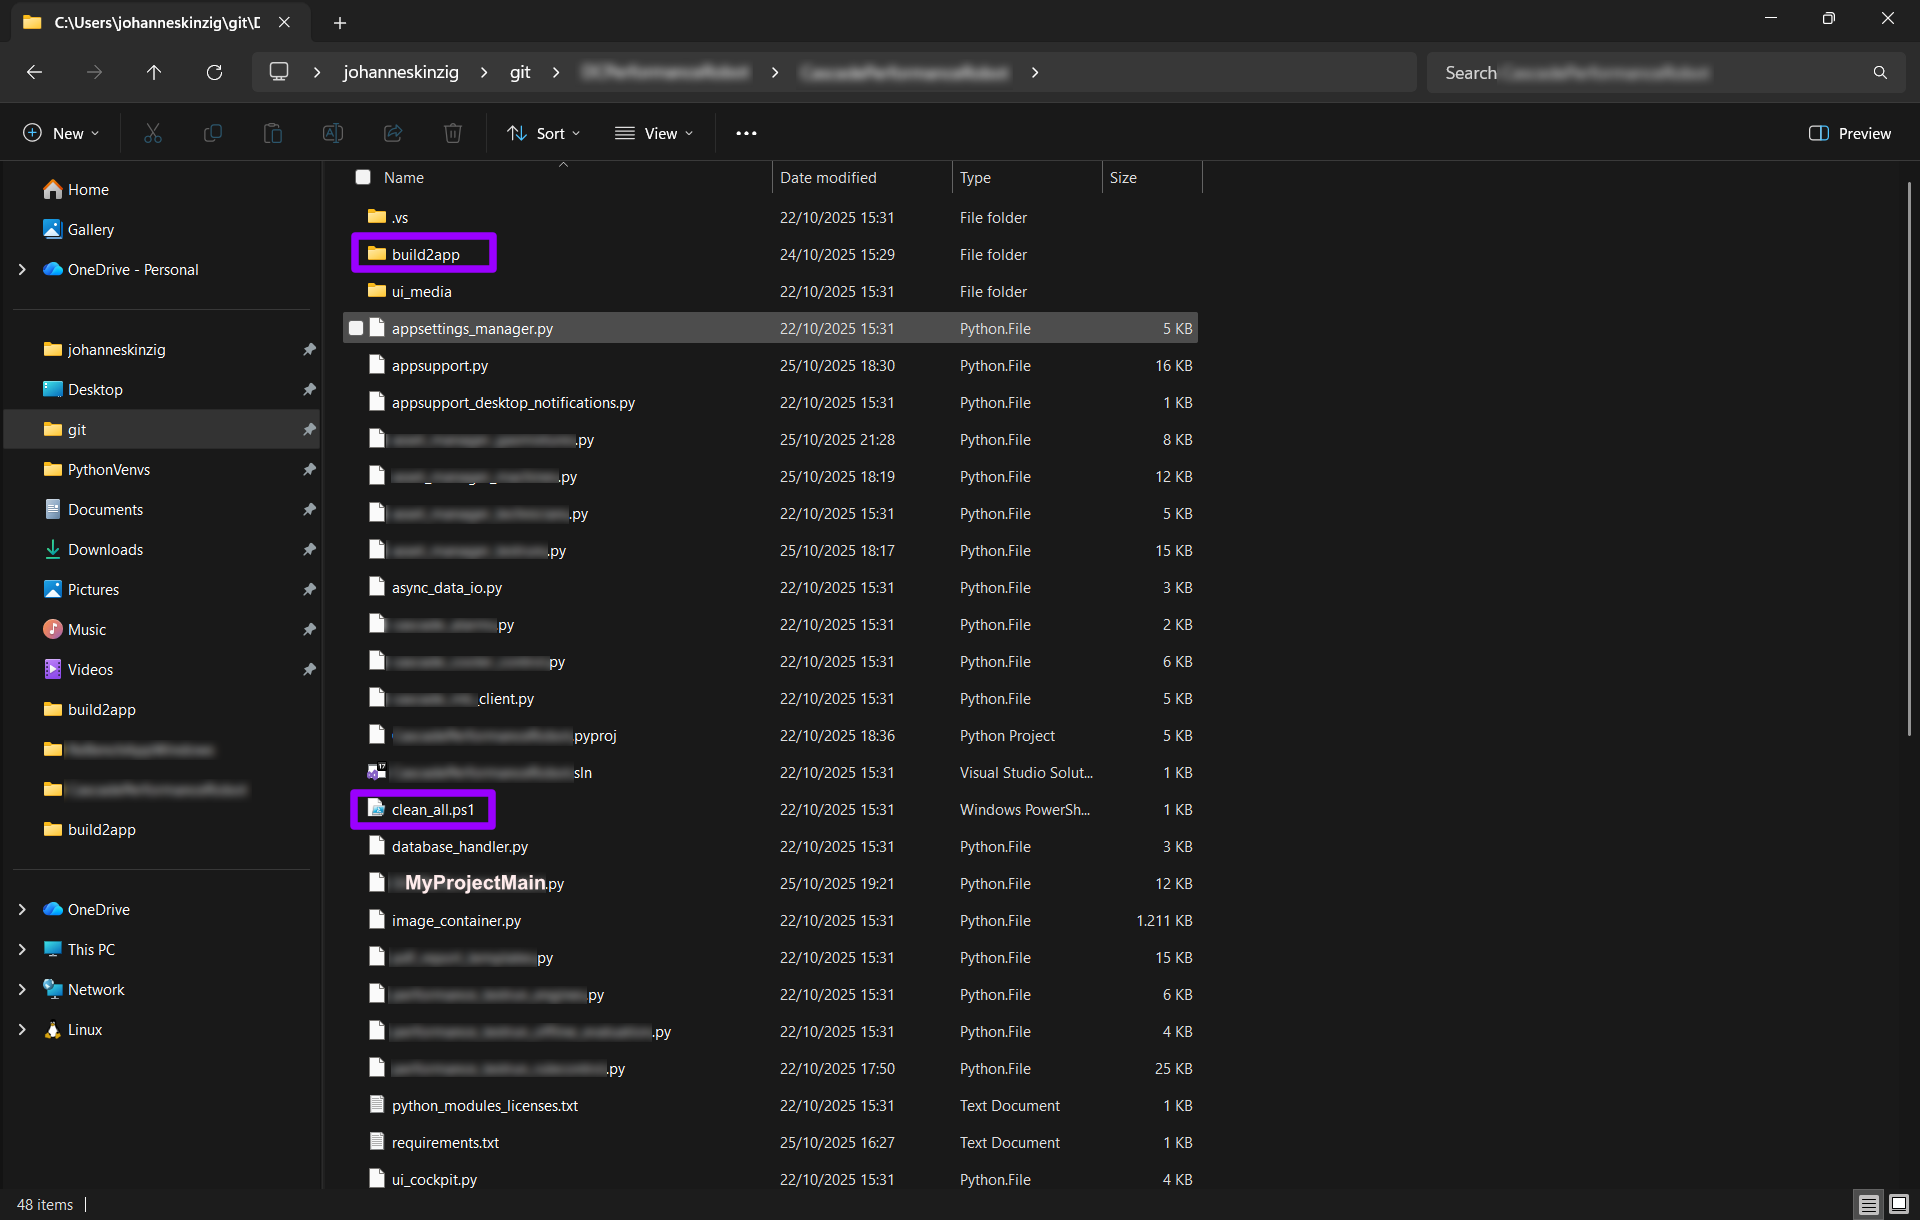
The script assumes it’s located in a subfolder within your Python project’s source directory. The screenshot below shows my personal folder structure for Python projects on Windows:
The script expects PyInstaller to be installed in the virtual environment referenced within it. If it’s not yet installed, simply follow these steps:
# Activate your virtualenv and run:
pip install pyinstaller
pip install pyinstaller-hooks-contrib
Setup – Lines 12…14
- In line 12, provide the name of your Python’s main source file (excluding the .py extension).
- In line 13, specify the product name (the desired executable file name, excluding the .exe extension).
- In line 14, specify the relative path (as seen from this script) to your code-signing certificate, which is provided as a .pfx container (*.pfx means, your private key is included together with your certificate).
Building and Cleanup – Lines 24…32
- In line 25 you specify the relative path (seen from this script) to your virtualenv's activation script.
- Line 28 cds one directory up (into your Python project’s source directory). This script assumes it’s located in a subfolder in your Python project’s source directory (see screenshot above).
- Line 30 runs a cleanup script (see below) which deletes all temporary and intermediate build files from previous runs.
- Line 31 calls PyInstaller and its command line arguments to build the actual *.exe file. Here you need to give all relevant flags required to successfully freeze your source into a binary executable.
clean_all.ps1
Remove-Item -ErrorAction SilentlyContinue -Recurse .\__pycache__
Remove-Item -ErrorAction SilentlyContinue -Recurse .\build
# add additional cleanup commands here, as required
Code Signing – Lines 35…49
- Line 38 activates the Visual Studio 2022 Developer Shell, which is required to run the actual code-sign command (signtool in line 44).
- Line 41 asks for the password for the code-signing certificate (which was given in line 14). The password is handled by PowerShell as -AsSecureString which prevents displaying it in plaintext.
- Line 44 does the actual signing and line 46 does a verification to ensure proper signing.
That's basically it, building the *.exe and code-signing it in a simple PowerShell script.
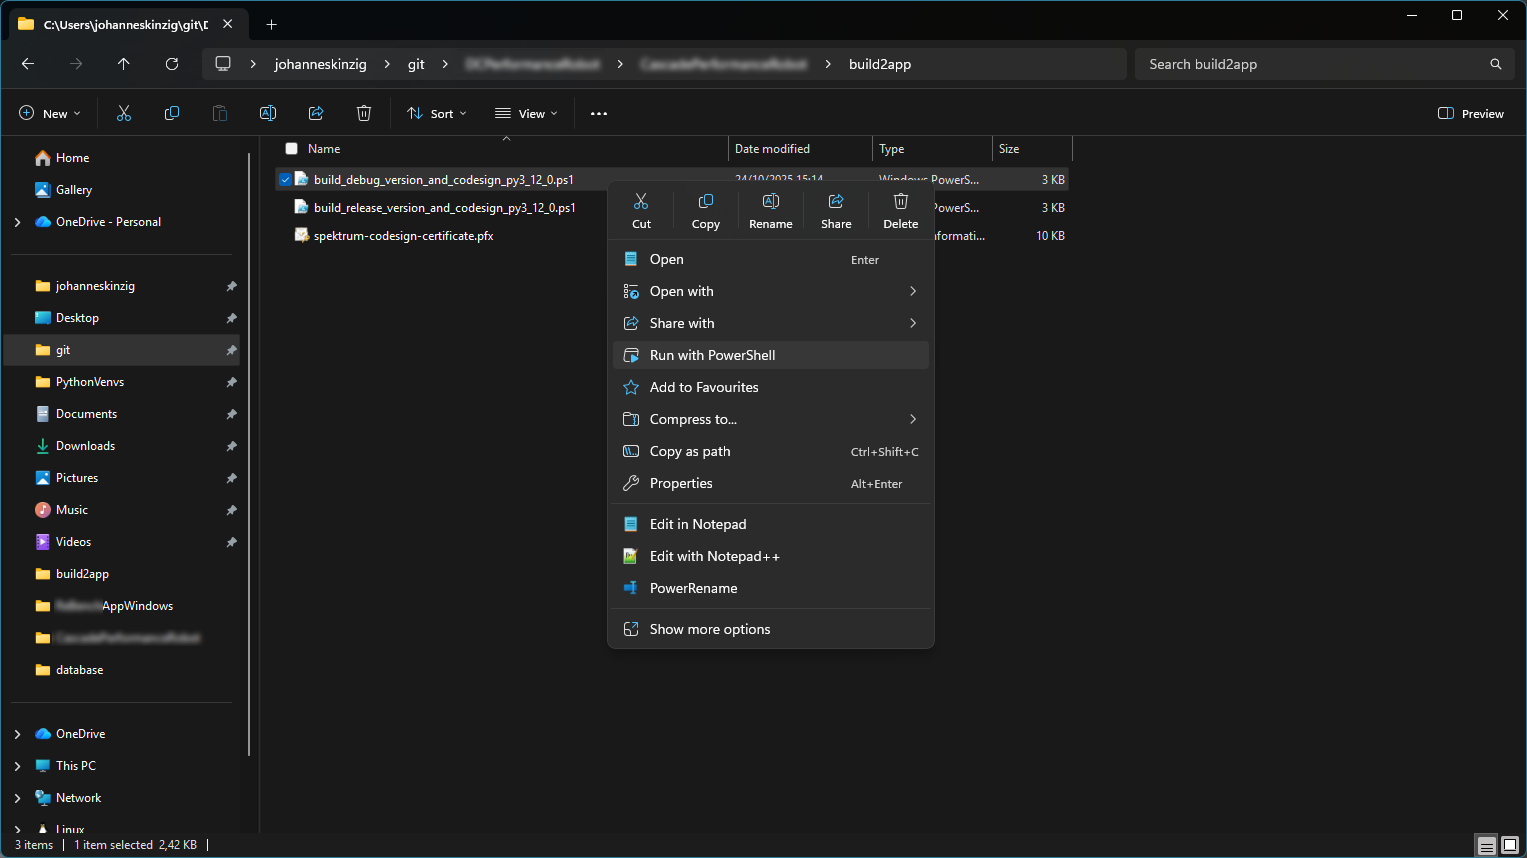
Invoking the script from Windows Explorer
What I especially like about this script – besides its potential for CI/CD integration – is how easily it can be launched directly from Windows Explorer:
Some words about code-signing and required certificates (on Windows)
Microsoft SmartScreen Filter
Signing your application with a valid code-signing certificate doesn’t necessarily guarantee that Microsoft SmartScreen won’t display a warning when your app is launched (see Microsoft SmartScreen on Wikipedia).
As far as I know, this behavior depends largely on the certificate’s reputation – meaning whether the certificate has been associated with trustworthy software in the past. That reputation might be influenced by factors such as previous malware reports involving the same certificate. This is, however, my personal understanding and not an official statement.
Code-Signing Certificate Types
When purchasing a code-signing certificate, you can choose between several validation levels that determine how you (or your company) are verified – and consequently, what type of certificate you receive.
The exact process depends on the certificate authority (e.g., DigiCert, Sectigo/Comodo, etc.) and whether you’re signing as an individual developer or an organization. Typically, you can select between:
- Basic Validation (Individual Validation): verifies you as a private person
- Organization Validation (OV): verifies your company’s legal identity
- Extended Validation (EV): includes the highest level of identity verification and often comes with additional hardware security requirements
Each level has different requirements and trust implications. In my case, I used a Basic Validation certificate, simply because it was the easiest (and most affordable) option to obtain.
However, the signing command in the script remains exactly the same for all certificate types – as long as your certificate is provided as a *.pfx container.
Obtaining a Code-Signing Certificate
When I originally wrote the script (around 2022), it was still possible to obtain a code-signing certificate directly through your web browser or a small utility provided by the certificate authority. In that process, you would receive your certificate and private key bundled as a *.pfx container – ready to use for signing applications.
Today, that’s no longer the case. Most certificate authorities now issue hardware-based certificates, meaning your key and certificate are stored on a physical USB token that’s shipped to you by mail.
It’s still possible to sign your applications using a hardware token with the signtool command used in the script above, but the command needs to be adjusted accordingly.
Since my current certificate hasn’t expired yet, I haven’t personally used signtool with a hardware token – but once I renew my certificate, I plan to update the process and share the details.
📬 Stay in the loop?
If you’d like to stay up to date with future technical guides and project insights, subscribe to my newsletter. I share practical knowledge, lessons learned, and updates – no spam, just content for developers and engineers.